
Getting Paid: How TikkBay Payouts Work for Nigerian and African Event Organizers
Apr 14, 2026 · 10 min read
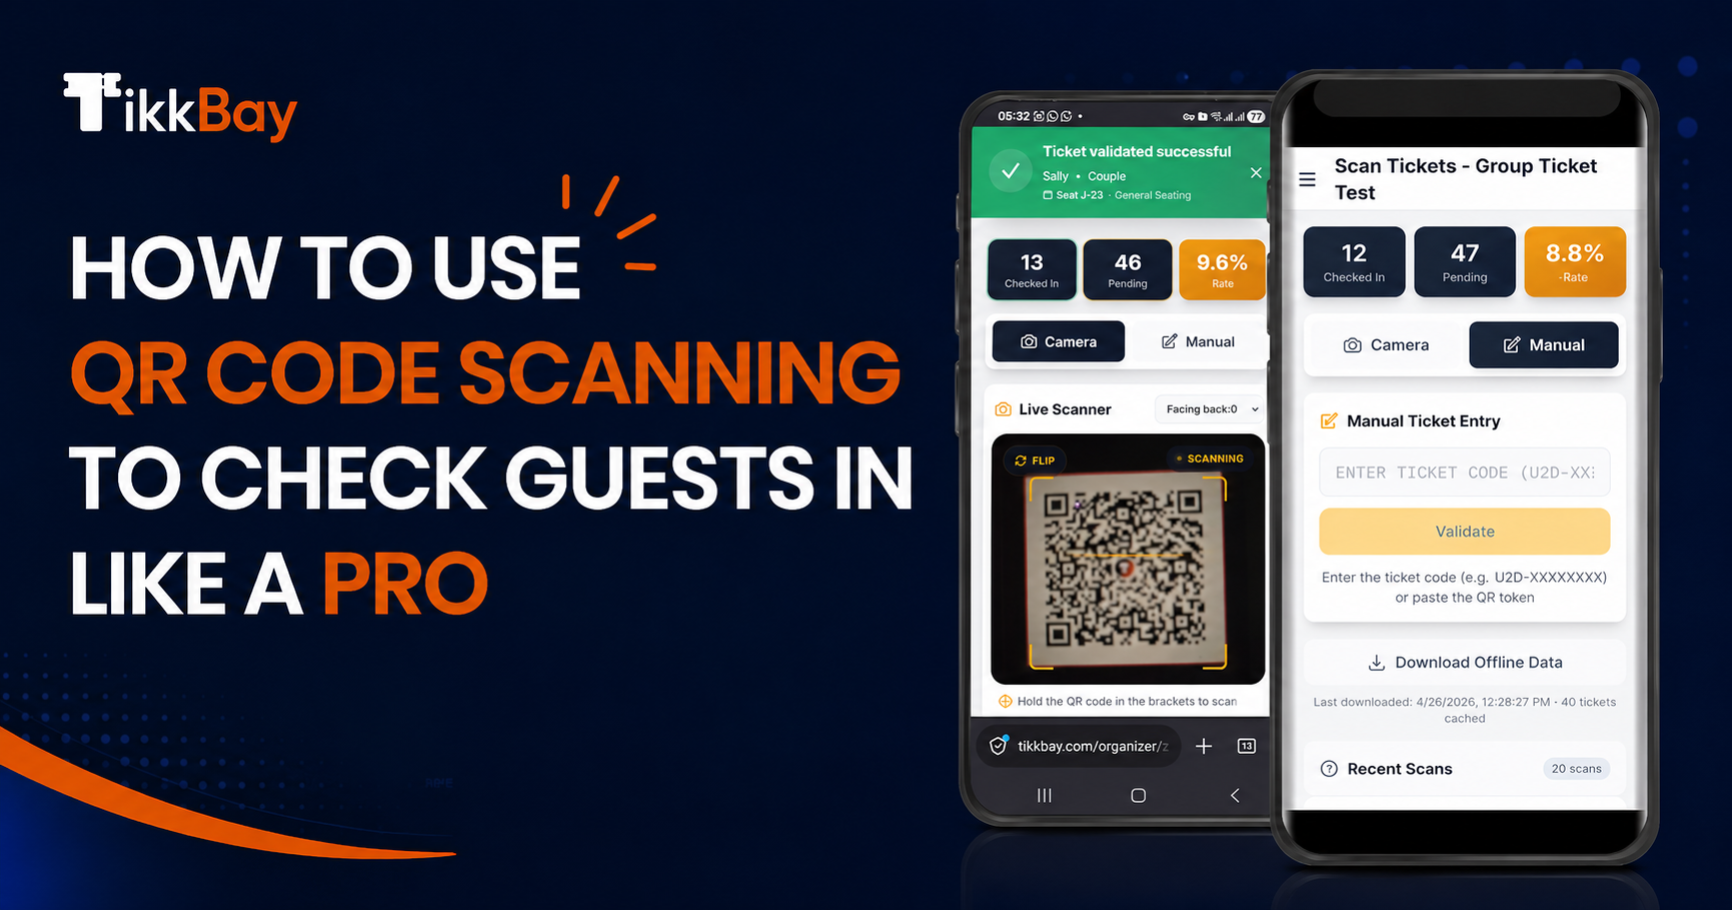
The entrance is where your event makes its first impression. Long queues, confused staff, and arguments over tickets can sour a guest's mood before they even walk in. A fast, confident check-in does the opposite. It tells every guest that they are in good hands.
TikkBay's QR code scanner is built to make that smooth entrance effortless. There is no special hardware to buy and no separate app to install. You and your team check guests in using the devices already in your pockets, and you watch your attendance climb live as people arrive.
This guide covers everything you need to run the door like a professional: how the scanner works, how to read each result, how to track attendance in real time, how to keep scanning when the internet drops, and how to share the workload across your team.
The scanner runs in your web browser, so it works on a phone, tablet, or laptop with a camera. There is nothing to download.
Each ticket your guests receive carries a unique QR code. When that code is scanned at the door, TikkBay checks it against your event's records in an instant and tells you whether to let the guest in. Behind the scenes, the system is doing careful verification, but to your team it feels as simple as pointing a camera and getting a green tick.
To open the scanner, sign in, go to your event on your organizer dashboard, and open the scanning page. As long as you are the event owner or a team member with scanning permission, the scanner is ready to use. More on sharing access with your team later.
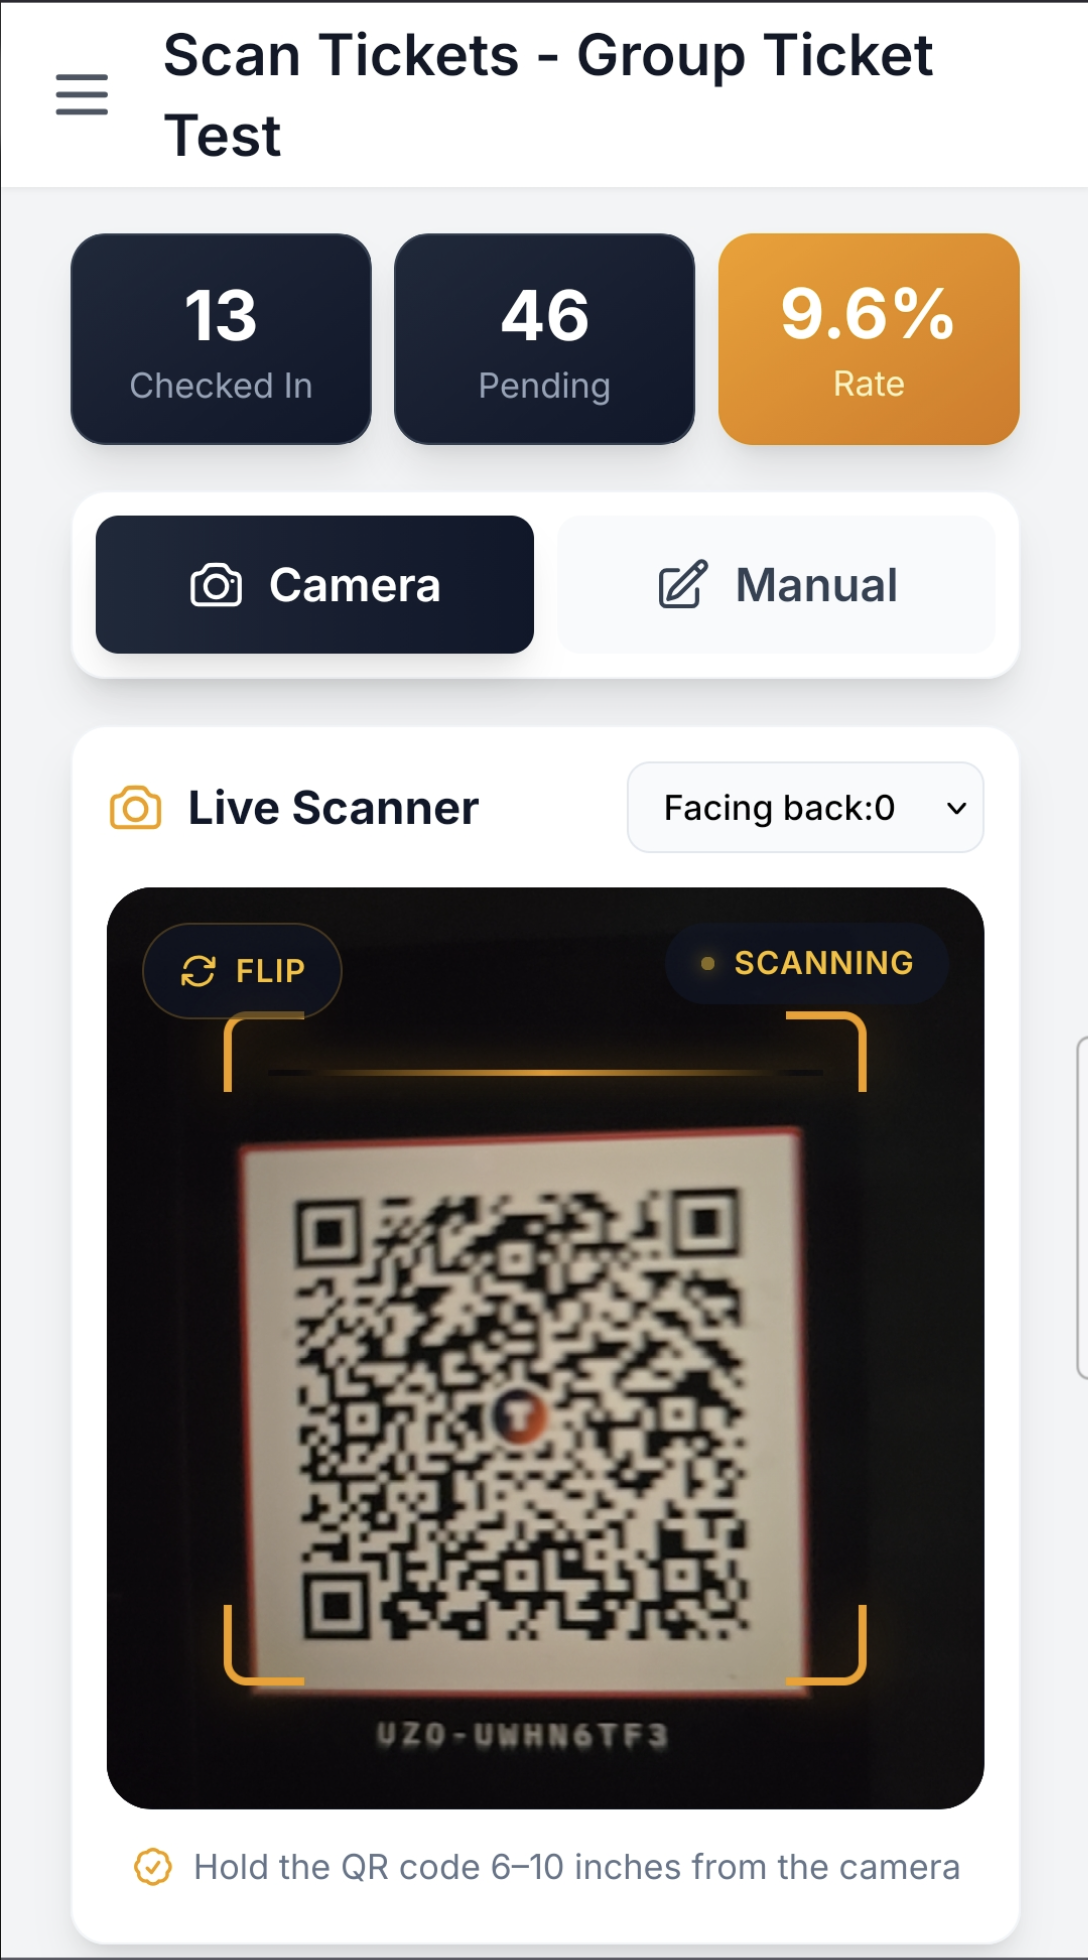 Mobile screenshot: The scanner page on a phone showing the live camera viewfinder ready to scan, with the attendance stats above it
TikkBay gives you two scanning modes, and you can switch between them with a single tap depending on the situation at your door.
Camera Mode: The Live ScannerThis is the mode you will use most. Tap to enable your camera, hold the guest's QR code in front of it, and the scanner reads the code automatically. There is no button to press for each scan. As soon as the code is in frame, it registers.
For the best results, hold the QR code roughly six to ten inches from the camera. If your device has more than one camera, you can pick which one to use or flip between front and rear cameras with a single tap, which is handy when you want the guest to present their own phone to your camera.
The camera mode is designed for speed. Your team can check guests in one after another, each scan taking only a second, which keeps even a busy entrance flowing.
Manual Mode: Type the CodeSometimes a QR code will not cooperate. A guest's screen might be cracked, their brightness might be too low, or a printed ticket might be smudged. For these moments, switch to manual mode and simply type in the ticket code printed on the ticket, then tap Validate.
Manual mode runs exactly the same checks as the camera. It is your reliable backup so that no guest is ever stuck at the door because of a scratched screen.
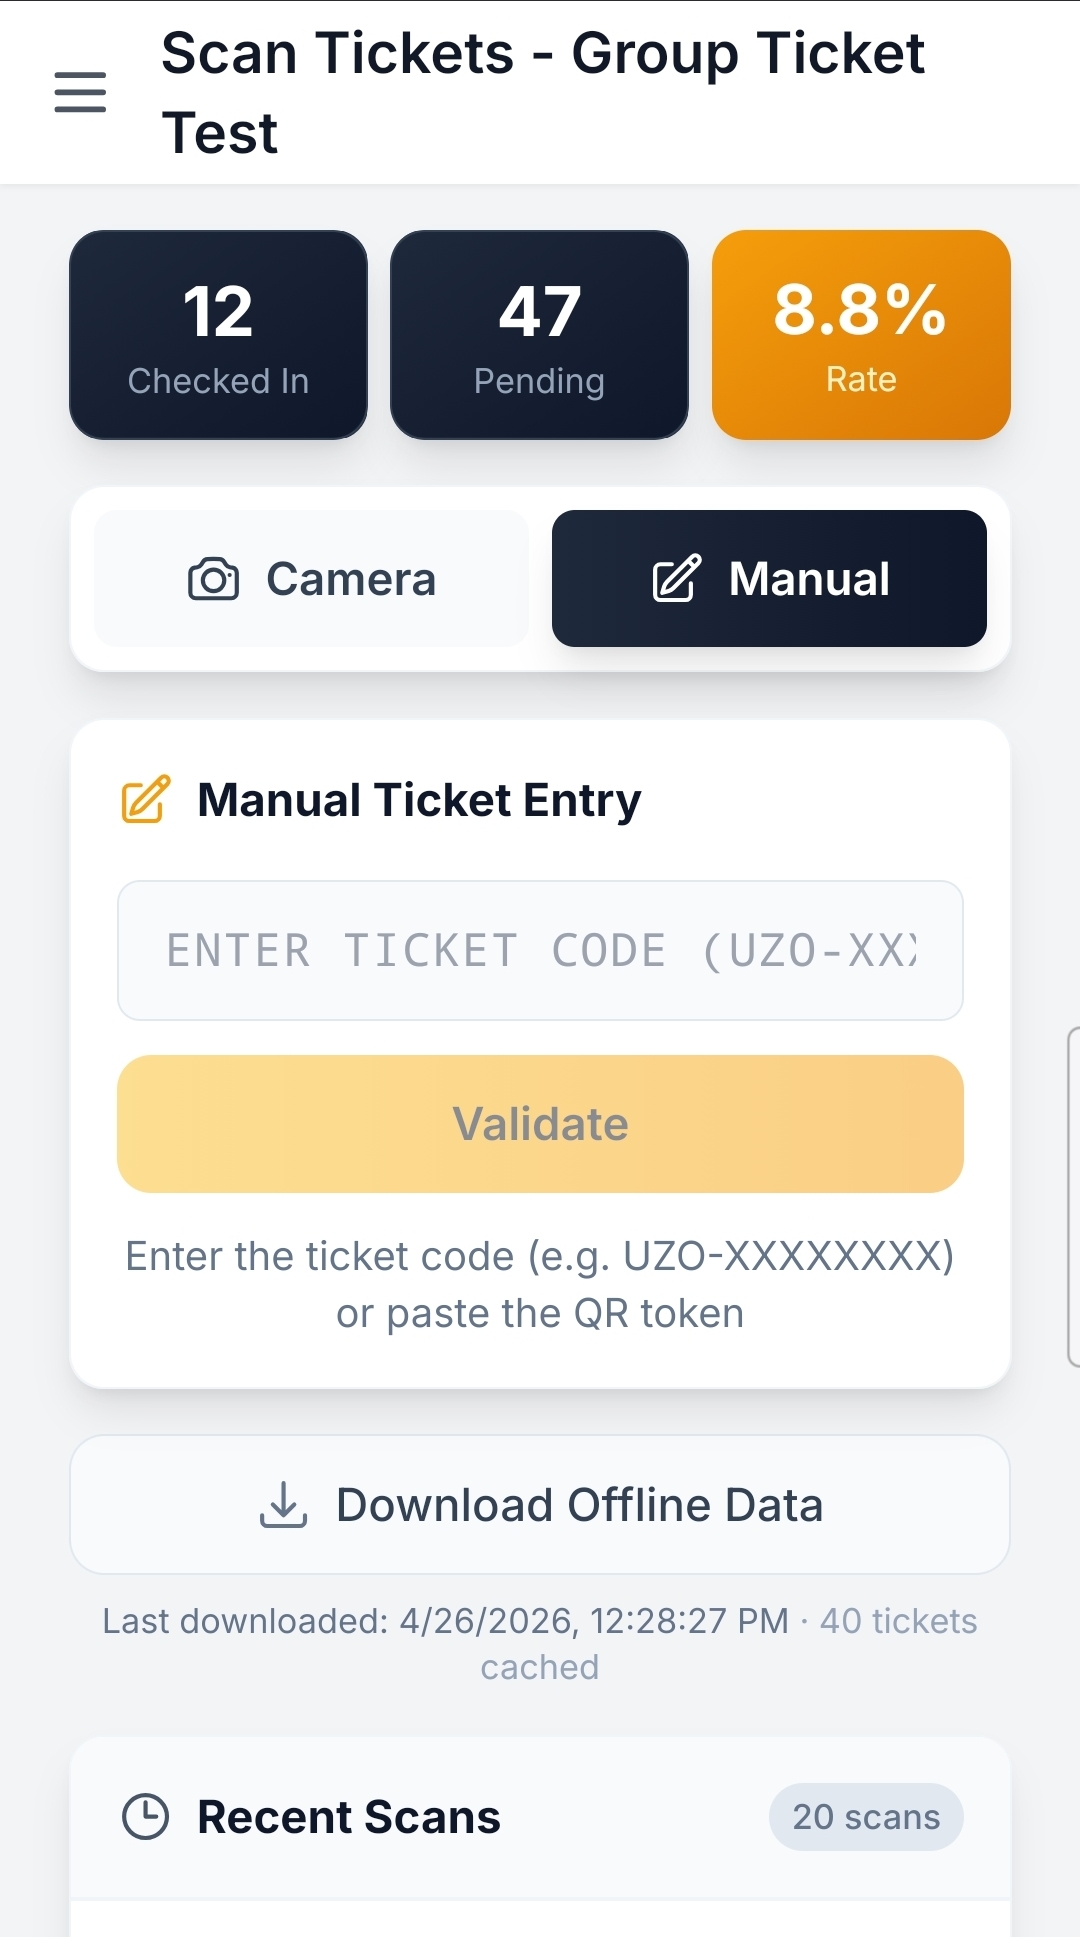 Mobile screenshot: The scanner showing the Camera and Manual mode toggle, with Manual mode selected and the ticket code entry field visible
Every scan gives you a clear, instant verdict so your team never has to guess. There are two outcomes, and they are impossible to confuse.
A Green Result Means Let Them InWhen a ticket is valid, the scanner shows a bright green confirmation with a tick. It displays the guest's name and their ticket type, so your team can give a warm, personal welcome rather than a robotic wave-through.
If your event uses reserved seating, the green result also shows the guest's seat and section, which helps your ushers point them in the right direction. If your event runs across multiple dates, it shows which date the ticket is valid for, so a guest holding a ticket for a different night is caught immediately.
Once a ticket scans green, it is marked as checked in. That same ticket cannot be used again to slip a second person through the door, which leads to the second result.
A Red Result Means Stop and CheckWhen something is wrong, the scanner shows a clear red warning with an explanation of exactly what the problem is. The message tells your team what happened, so they know how to respond. The most common red results are:
> Already used: The ticket has already been checked in, and the scanner tells you the exact date and time it was first scanned. This is your protection against duplicated or shared tickets. If someone screenshots their friend's ticket and tries to enter on it, the second scan turns red and shows when the original entry happened.
> Invalid: The code does not match any ticket for your event. This usually means a fake ticket, a screenshot of something unrelated, or a code from a completely different source.
> Wrong event: The ticket is real, but it belongs to a different event. The guest may simply be in the wrong place.
> Cancelled: The ticket was cancelled, for example through a refund, and is no longer valid for entry.
Because each red result explains itself, your door staff can handle problems calmly and confidently rather than freezing up or waving someone through out of uncertainty.
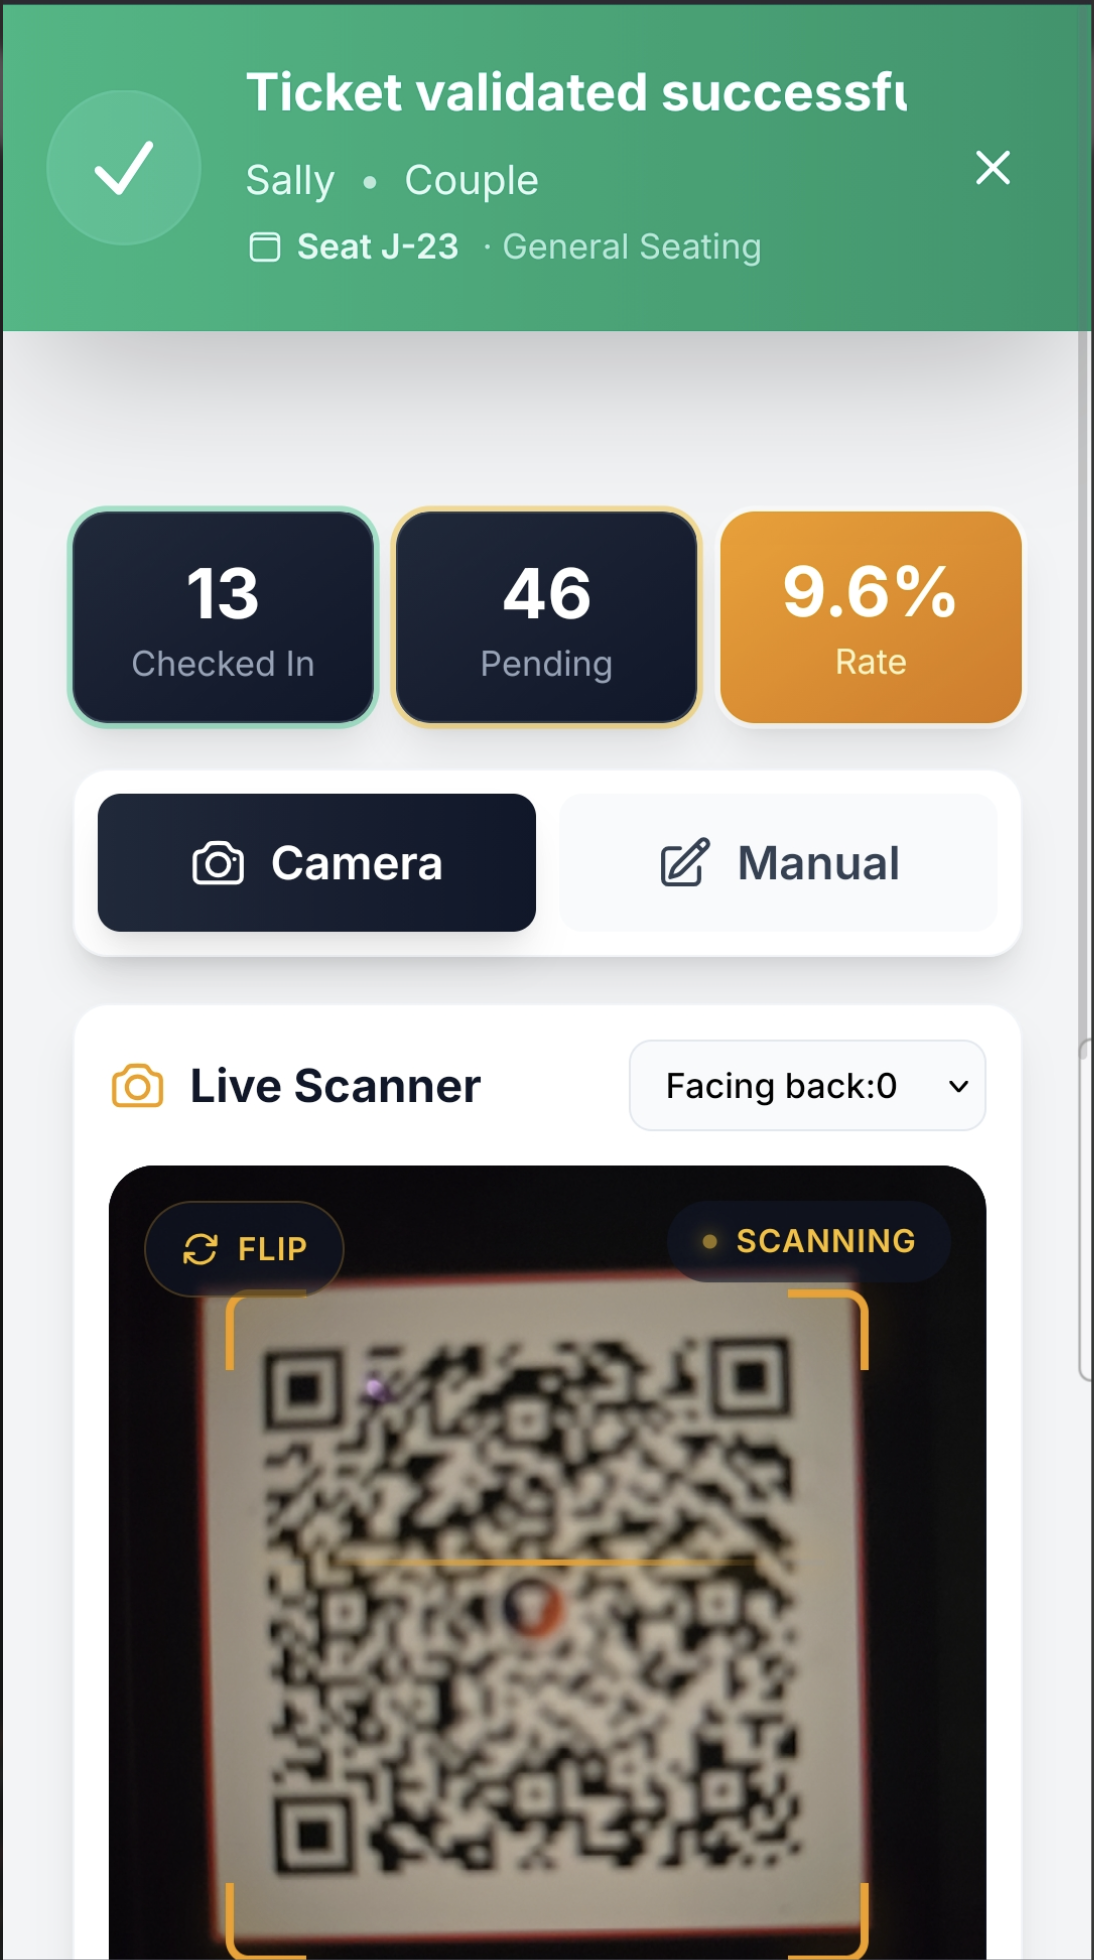 Mobile screenshot: A green successful scan result showing a guest name and ticket type
Above the scanner, TikkBay shows you a live summary of your event's attendance that updates with every scan. Three figures keep you informed at a glance.
Checked In shows how many guests have arrived. Pending shows how many valid tickets are still outside waiting to come in. And the check-in rate shows the percentage of your tickets that have been scanned so far.
These numbers are not a static snapshot that you have to refresh. They update the moment a ticket is scanned, and the figure briefly flashes so you can see it move. For an organiser, this is genuinely useful information in the moment. You can see when the rush is happening, judge whether to open another entrance, and know roughly how many guests are still to come.
[SCREENSHOT: The live attendance bar showing Checked In, Pending, and check-in rate figures above the scanner]
Large events rarely have a single entrance, and TikkBay is built for that reality. You can have several team members scanning at once, on different devices, at different doors, and the attendance count stays accurate for everyone.
When a guest is checked in at the main gate, the count updates on the scanner at the side entrance too, within moments. Every scanner sees the same live picture, so two doors can never accidentally admit the same ticket. The system keeps everyone in sync automatically, whether your devices are connected by the venue's wifi or by mobile data.
This shared, live view is what lets a big event run several lanes at full speed without the entrances drifting out of step.
Anyone who has run an event in a basement venue, a marquee, a stadium, or a remote location knows that connectivity can be unreliable exactly when you need it most. TikkBay is designed so that a weak signal never stops your door.
Before your event begins, while you still have a good connection, tap Download Offline Data. This saves a secure copy of your event's ticket information to the device so it can verify tickets without needing the internet. The scanner shows you when you last downloaded and how many tickets are cached, so you know you are prepared.
If the connection drops during the event, the scanner notices and switches into offline mode, showing a clear banner so your team knows what is happening. You carry on scanning exactly as before. Valid tickets are checked, problems are flagged, and each offline scan is marked so you can see it is waiting to be recorded.
When your connection returns, tap to sync, and every scan you took offline is sent up and recorded in one go. Your attendance count catches up, and your records are complete. Your guests never see any of this. To them, the door simply kept moving.
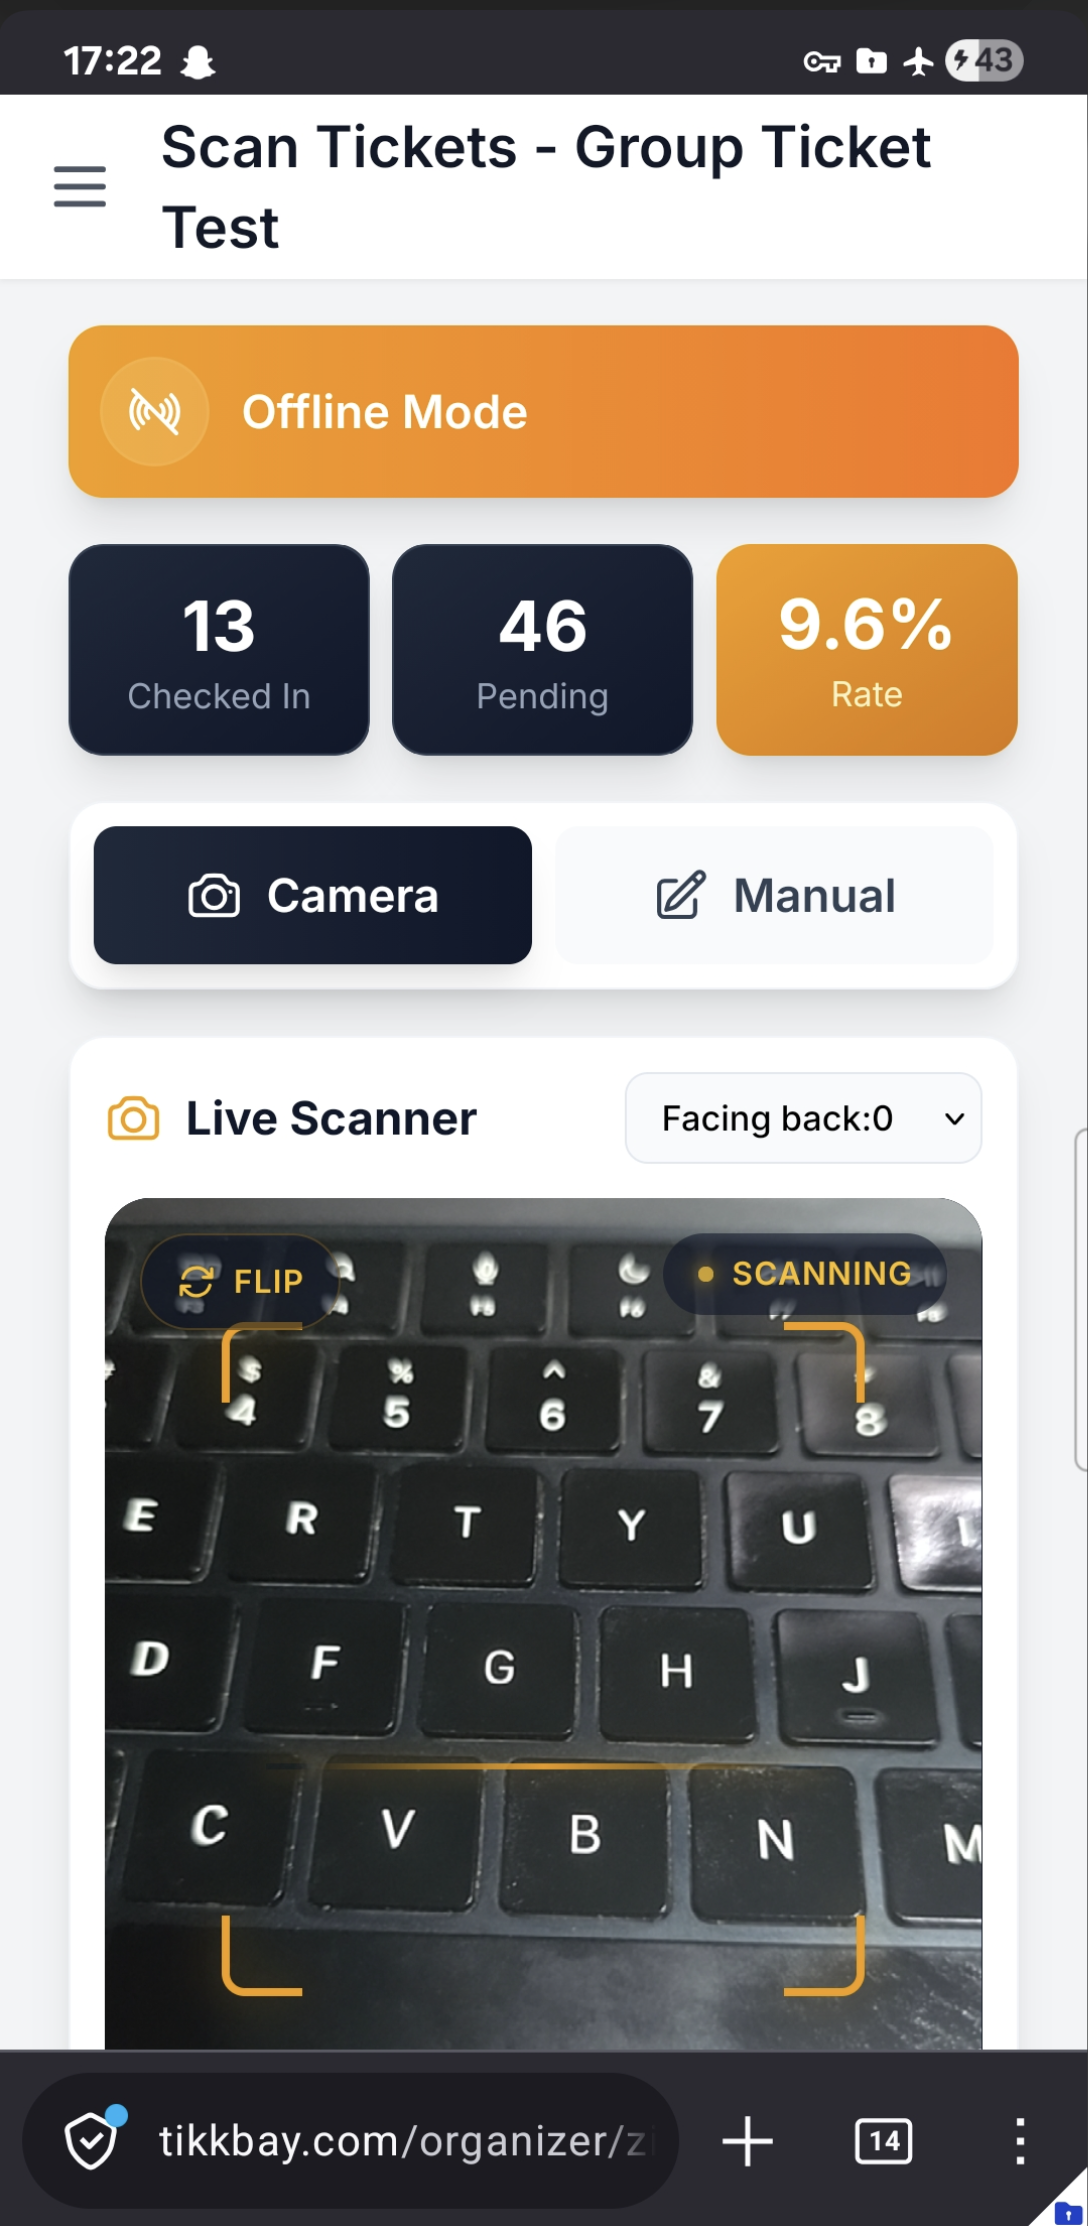 Mobile screenshot: The scanner in offline mode showing the offline banner
Beneath the scanner, TikkBay keeps a live feed of recent scans. Each entry shows the guest's name, their ticket type, the result, and the time. If your team is sharing the work, it also shows which team member performed each scan.
This feed is reassuring during the event, because you can glance down and confirm that scans are registering as expected. It is also useful afterwards, giving you a clear record of who came in and when, which feeds into the fuller attendance data on your dashboard.
You should not have to scan every ticket yourself, and you do not need to share your own login to delegate it. TikkBay lets you invite team members and give them permission to scan.
A team member with scanning permission can open the scanner for your event and check guests in, but their access is limited to what you grant them. You decide who can scan, which means your door staff can do their job at the entrance without being able to see your revenue, change your event, or touch your settings. Everyone gets their own secure login, and the recent scans feed records who did what, so you always have accountability at the door.
This is the professional way to run a larger event. You position trusted team members at each entrance, give them scanning permission, and free yourself to manage the bigger picture.
It is worth knowing that the scanner is not just convenient, it is secure. Each ticket's QR code is protected so that it cannot be guessed or forged, and your event's records hold only a scrambled fingerprint of each code rather than the code itself. When a ticket is scanned, the system matches that fingerprint to confirm the ticket is genuine.
The scanner also guards against anyone trying to rapidly test large numbers of fake codes, by limiting how fast scans can be submitted from a single account. None of this is something you have to configure. It simply works in the background to make sure that a green result really does mean a genuine, valid ticket.
A little preparation makes the difference between a calm entrance and a chaotic one. Before your event, run through this short list:
With those steps done, your team can focus on welcoming guests rather than wrestling with technology.
A smooth entrance is one of the clearest signs of a well-run event, and it is entirely within your reach. With TikkBay, you check guests in using the devices you already own, you watch your attendance build live, you keep moving even when the internet does not cooperate, and you share the work across a team without handing over the keys to everything.
Head over to tikkbay.com, open your event, and get your team set up on the scanner before your next door opens. Your guests will feel the difference from the very first scan.
If you are still building your event, start with our guide on How to Create Your First Event on TikkBay and Start Selling Tickets in 10 Minutes, then come back here to prepare for a flawless entrance.

A global event discovery and ticketing platform. Find something worth dressing up for.

Choose whether to allow optional cookies for analytics, personalisation and marketing. Read our Privacy Policy.
TikkBay Support
Usually responds instantly
Create a Support Ticket
Powered by Plusky IT Solutions
Need help? We're here!
Ask about tickets, events, payouts, and more. Click to chat.